Printing and weeding an extremely complex design or image can take forever and a day to finish. Who likes wasting time on that when you have the option of a self-weeding media like Forever Laser Dark? With Forever Laser Dark, you can print on cottons, polyester, mixed fabrics, nylons, etc. Aside from that, it has a really soft feel so the garment won’t feel like there’s a heavy print on it and it has a durable adhesive that can last after many washes.
“But, why use this product on a white shirt when it’s meant for dark garments?” you might ask. Well, this media is also great for light colored garments. Additionally, you can use it with Hot Stamping Foil to elevate your design like what we did here. Continue reading below to know how we did it.
Here is the full video of the article below
or click the timestamps to skip to specific parts
Chapter 1 00:00 Print Settings
Chapter 2 4:23 Marrying the sheets
Chapter 3 10:24 Pressing the First Design
Chapter 1 00:00 Print Settings
Chapter 2 4:23 Marrying the sheets
Chapter 3 10:24 Pressing the First Design
Chapter 1
Print Settings
We created a design of Johnny Mathis to be printed on a white shirt using Forever’s Laser Dark. This design was split into two pieces of artwork – the first one for the hot stamping foil and the second one for the color image to go on top. We also used the Transfer RIP Software in order to print the design.
The first design was printed as black for two copies using the standard screening from printer settings. We configured our iColor 600 printer to expect tabloid size transparency media so we don’t have to press the online button between each print.
The second design was the Johnny Mathis colored image. It is an image with a full scale of white in the back. We didn’t want this white because we’re putting this onto a white shirt and it will go over the hot stamping foil when we press the first design, but since we’re using the laser dark media, we needed the white toner to fill in and give the laser dark media something to bond with.
We went a little bit higher in the amount of coverage, just to make sure that we’ve got a full amount of white filling in all of the areas. In order to not print all of that full on white, I’m going to use screening configured as a mask for bright media. This option pulls out the white that’s in the design and replaces it with the white that’s in the shirt. Our shadow tolerance value was 170-180 to give us a good amount of white removal but still have the tints of white in the areas where we’re looking for. We used 28.00 LPI mask with the Euclidean round dot. This gave us enough masking to give it a nice, soft feel while at the same time, there’ll be plenty of detail in the final design. 52.50 is the recommended angle when using the Euclidean dot. And again, we printed two copies of this. We found that by offsetting the design by -4 shifts the design over towards the center in the sheet. Then we hit print.
Continue reading below…
Check Out the Featured Products
Chapter 2
Marrying the Sheets
After both designs were printed, we lined each of them to the adhesive sheet and covered it with parchment papers. We pressed it for two minutes at 310°F. Then after pressing, we did a steady hot peel and trimmed around the edges to get rid of the glue that oozed out. It’s a little bit less of an issue for white garments because the adhesive isn’t really going to show up but we trimmed it off just in case.
When using older presses, we found that if you’re having any issues, stop about halfway through the pressing time and turn your design then press it and finish the pressing time. This technique helps in some pressing issues brought by using an old heat press.
Chapter 3
Pressing the First Design
So now we’re ready to start making our garment itself. Another reason we like using the Laser Dark media for lighter garments is that a lot of times when using Laser Light or Laser Transparent we can get some scorching on the garment because of the high temperature requirement. With the Laser Dark, we can apply this all the way down to 225°F if we need to. It gives us the ability to work with delicate types of fabrics. So we placed the shirt on the heat press and pressed it to get it nice and flat.
So the first thing that we want to put down is the design where the hot stamping foil will adhere to. When we’re doing a double piece like this we use both of them together so we can get a better idea how the centering and alignment works. After we determined where we would press the design, we removed the colored image first and started working with the all-black design.
We covered the first design with some parchment. Since we’re going to use this with hot stamping foil, we’re only going to use low pressure for just a few seconds because all we wanted to do is basically just tack this sheet to the shirt. We did a cold peel process to remove the design from the shirt. We recommend peeling it off in a tight roll for a clean removal.
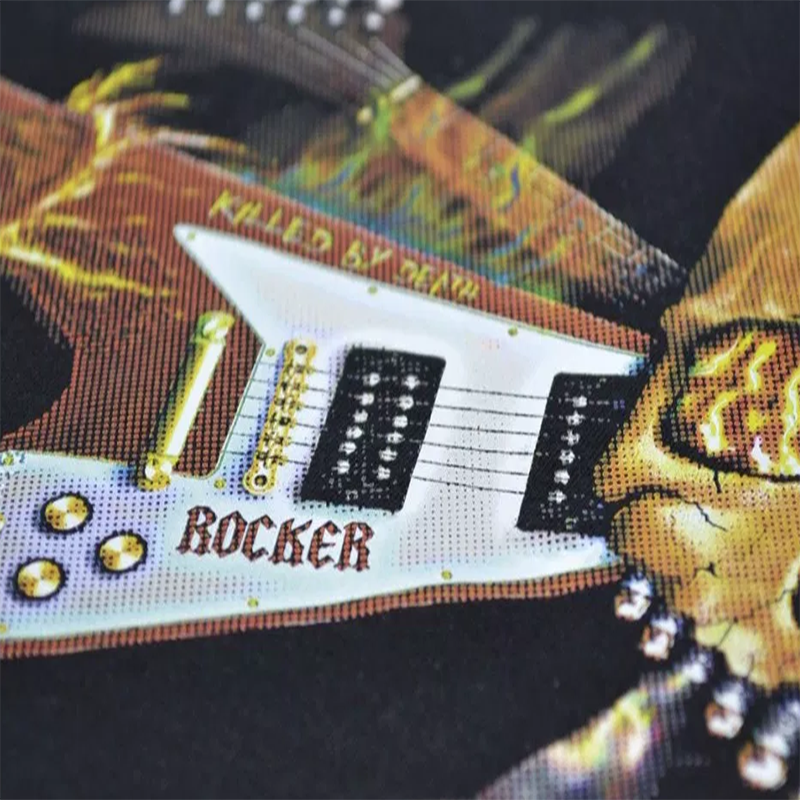
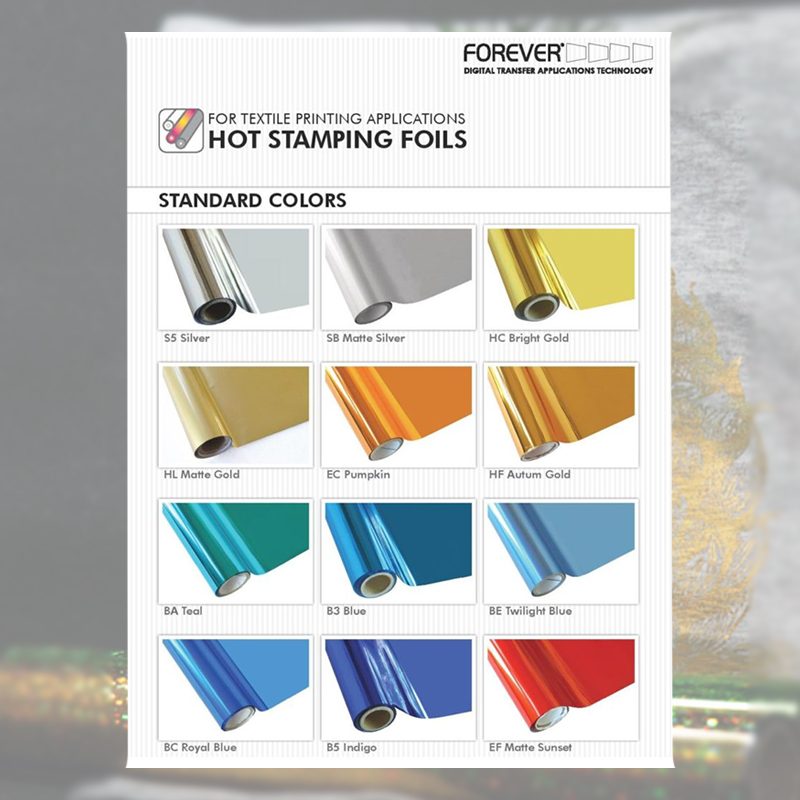
To avoid making the design look squared-off, we sprinkled Bo-Nash Fuse It Powder on the edges to get rid of the line and for the hot stamping foil to stick on to. After that, we covered everything with gold hot stamping foil then with parchment paper and pressed it at 310°F on full pressure for 20 seconds.
We let it cool off before we peeled it.
Chapter 4
Pressing the Second Design
We placed the shirt back under the heat press and aligned the second design on the already pressed design. The nice thing about this media being transparent is it makes it easy for us to position the design when we’re layering. We covered it with parchment paper and pressed it at 310°F for 20-30 seconds. After that, we’ll do a cold peel in a nice tight roll.
We could do this kind of design without the Hot Stamping Foil using the Laser Transparent or the Laser Light media. But when you’re doing a toner bond onto a shirt, you don’t get the full durability with those compared to the Laser Dark adhesive. With Laser Dark, you’ll get a great durability and you can do real rasterization.
.
Chapter 5
Repressing
The design is still sitting up high on the shirt so we placed it back under the heat press and gave it one more good press. We added a little bit more pressure to it so we’re really pressing it into the garment and to give it the maximum durability. After pressing, we lifted it from the pressing machine and there, we had our finished product.
Even though this product is called Laser Dark, it’s certainly usable for any type and any color of garment as what we did here. Laser Dark has a more durable adhesive compared to other products therefore you can expect a print that will last a long time, not to mention the nice soft feel and improved wash durability that you can get from rasterization. Level up your creativity and design by partnering this product with Hot Stamping Foil. Give this a try and sound off below. Let us know if you love the soft feel and the durability it gives.